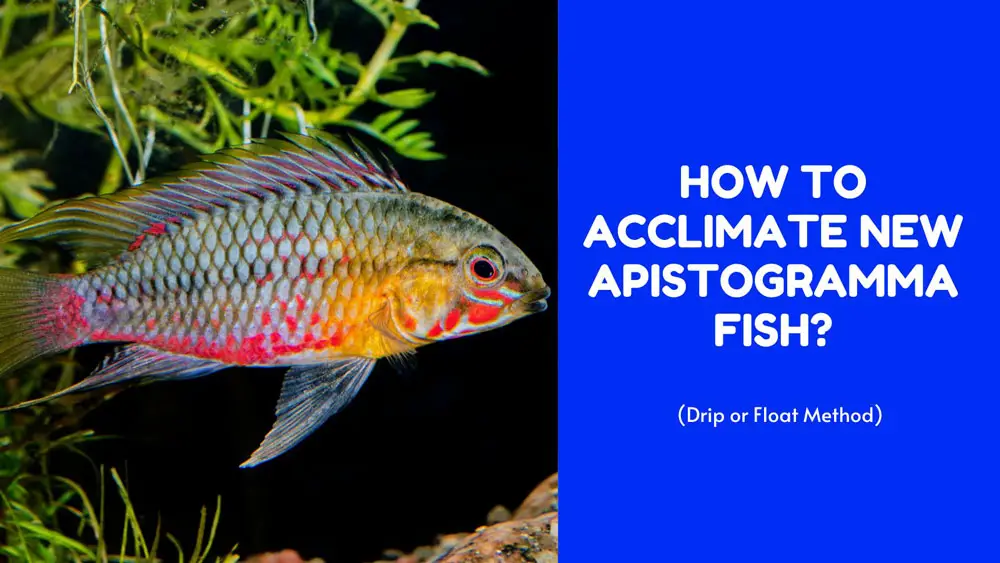
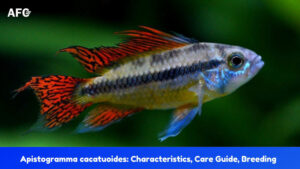
Welcome to the fascinating world of Apistogramma fish! These stunning dwarf cichlids are renowned for their vibrant colors and fascinating behaviors, making them a highly sought-after addition to any dwarf cichlid enthusiast’s collection.
But before you can witness their beauty in full bloom, it’s crucial to properly acclimate them to their new environment. Don’t let the stress of relocation harm your new aquatic friends.
Read on to learn the proper Apistogramma acclimation method that guarantees a smooth transition and promotes optimal health.
The Importance of Proper Acclimation for New Apistogramma
Upon receiving your Apistogramma fish from an online source or store, proper acclimation is essential, especially for wild-caught specimens since they are more sensitive to environmental changes.
By acclimating your newly-received fish, you can help them adjust to the water parameters in their new home as quickly and stress-free as possible, reducing the risk of acclimation shock – one of the biggest killers of new aquatic animals.
Apistogramma Acclimation Methods
Although the goal of a slow and careful acclimatization process is the same, the methods and nuances behind it have evolved over the years as new knowledge becomes available.
When it comes to acclimating Apistogramma and other aquatic life, the two most commonly used methods are the floating bag method and drip acclimation.
Floating Bag Method
Aptly named, this 1960s method is straightforward:
- Simply place the sealed shipping bag in your quarantine tank (QT) and let it float to equalize the temperature. This gradual process usually takes 15-30 minutes, depending on the temperature difference.
- Once the equalization period is over, open the bag and take 1/2 cup of water from the QT and add it to the bag.
- Repeat it every 15-20 minutes until the shipping bag is full.
- Take the bag out of the QT and pour about half of the water from the bag down the sink.
- After that, float the bag in the QT and repeat step 2.
- Net the fish from the bag, discard the water into a sink and carefully add the fish into the QT.
Reasons Why the Floating Bag Method Is Not Ideal for Apistogramma Acclimation
While there are several variations based on this broad approach, in most cases, it is a poor way to acclimate Apistogramma species unless you can buy them from local breeders (or LFS) within a driving distance of less than an hour.
Here is what you need to know about the defects of the floating bag method; they are quite clear and reasonable.
If you purchase Apistogramma online and not at a store, it may take a day or two for the fish to be delivered to your doorstep. During transit, the water temperature in the shipping bag can drop a bit, resulting in a reduction in the fish’s metabolic activity.
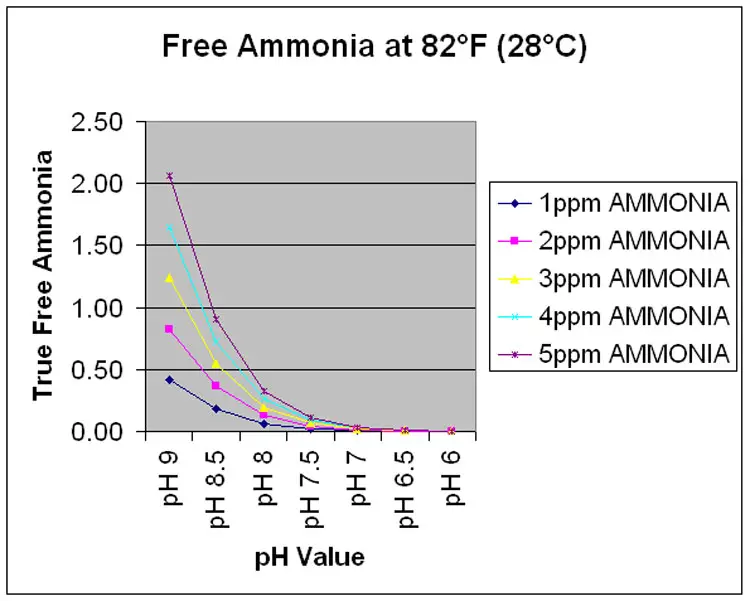
However, despite this, the accumulation of carbon dioxide and ammonia from the fish’s waste can still increase the acidity of the water in the bag. As you probably already know, ammonia exists mainly in the form of ionized ammonium (NH4+) at low pH and temperature, which is relatively non-toxic.
When you get the shipping bag float in a tank with warmer water, where the fish’s metabolism is ramped up and produces more carbon dioxide (CO2) and ammonia waste.
Once the bag gets opened, the carbon dioxide is released, and the excessively increased pH level converts the ammonia to the un-ionized form (NH3), which is a hundred times more toxic and can burn your Apistogramma’s gills.
On top of causing ammonia burns or even sudden death in fish, consider the following potential problems associated with the floating bag method.
- Hailing from soft, acidic water, Apistos can be very vulnerable to pH and temperature changes.
- It is possible that parasites or other disease-causing organisms can enter your tank by hitchhiking at the bottom of the shipping bag from the pet store.
- The increase in the fish’s metabolism means oxygen depletion in the fish bag. This lack of oxygen may cause your fish to suffer from hypoxia.
- Most often, the outside of the bag’s inner lining is dirty, even has debris inside, and should not be floated.
- Some breathable bags can allow the gas exchange through the bag’s wall, which creates a relatively stable environment. Once the fish bag is immersed in the aquarium, however, this process can be disrupted.
- Keeping any fish in a polluted, confined space longer than necessary is a poor husbandry practice.
Introduce the Squirt & Dump Method for Tank-raised Apistogramma
Now that you understand why the floating bag method isn’t ideal for Apistogramma let’s talk about the squirt & dump method.
The concept behind this technique is to add a few drops of water conditioner into the transport bag to neutralize the ammonia once the temperatures have equalized. Popular water conditioners like Novaqua plus or Seachem Prime can make the water safe for your new fish arrivals by detoxifying the excess ammonia.
Once you have made the most important parts of the game of conditioning the water, your next step is determined by whether your Apistogramma fish is tank-raised or wild-caught.
For commonly tank-raised Apistogramma specimens like A. agassizii “Fire Red” or cockatoo dwarf cichlid, which can handle a wide range of pH and temperature conditions than their wild-caught counterparts, you can go from step 2 of the floating bag method if you want.
While many aquarists prefer to transfer the fish into the quarantine tank (QT) right away rather than leaving them in a bag where ammonia levels are increasing, as they believe this is less stressful for the fish.
Acclimating Wild-caught Apistogramma with the “Squirt & Drip Acclimation”
For those wild-caught Apistos, you may have to use the drip method. This technique has been widely accepted at the hobby level for decades as the “advanced” way of acclimating sensitive aquatic life to a new environment.
What is Drip Acclimation?
The “drip acclimation” or “bucket method” is considered the gold standard among hobbyists of all levels. It works by introducing quarantine tank (QT) water to a bucket at a precise rate of drips per second using a handmade siphon device.
Initially, the Drip Acclimation Method was advocated mostly by saltwater marine aquarium hobbyists who have to monitor a wider scope of water parameters to acclimate new arrivals, not just the water temperature.
However, the same principle applies to sensitive Apistogramma fish because the difference in pH levels and Total Dissolved Solids (TDS) between the transport bag water and the QT water can easily shock the fish.
As a general rule, if the TDS (Total Dissolved Solids) or pH are different by more than 50mg/L or 1.5 pH points, respectively, there’s no doubt that you should use the Drip Acclimation Method for your newly-purchased fish.
Instructions for the Drip Acclimation Method
Before starting the acclimation process, gather the following items:
- A clean bucket or a specimen container (thanks to their small size, a 2.5- or 5-gallon bucket work sufficiently for Apistogramma fish)
- A length of aquarium airline tubing and an airline control valve (not necessary)
Once you have all the materials ready, here’s how to do it:
- Float the bag: Start by floating the sealed bag containing the fish in your aquarium. This will equalize the temperature inside the bag with your QT water, reducing temperature-related stress.
- Open the bag and neutralize ammonia: After 15-20 minutes, open the bag and quickly add a dose of a water conditioner like Novaqua Plus or Seachem Prime. This step neutralizes the ammonia in the bag, preventing additional stress and potential ammonia burns to the fish.
- Transfer fish to the bucket: Place the Apistogramma fish, still in its transport bag, inside the bucket or container. Carefully open the bag and pour the water, along with the fish, into the bucket.
- Start siphoning: Gently coil the aquarium tubing around the rim of the bucket, secure it in place with a clip, and create a siphon between the aquarium and the bucket. Attach the control valve or tie a loose knot in the airline to control the water flow.
- Adjust the drip rate: Aim for a slow drip rate of about 1-2 drops per second, and this can be achieved by adjusting the control valve or making the knot tighter. Don’t let the drip rate become too slow, which can cause the water to cool too quickly.
- Pour out half the water once the water doubles. Regularly monitor the water level in the container. Once it has doubled, remove half of the water and repeat the dripping process five times until the water from the shipping bag in the container to less than 10%.
- Net the fish to the quarantine tank (QT): Once the acclimation process is complete, gently use a net to transfer your new Apistogramma fish to your QT, making sure to avoid transferring any of the water from the bag.
Tips for Preventing Problems with Your Apistogramma Fish During Acclimation
To make the acclimation process go as smoothly as possible and reduce the chances of problems arising, keep these tips in mind:
- Make sure there is enough place in the bucket.
- Test the pH and water temperature when the water is doubled.
- You might want to pull the knot tight if it’s a really sensitive fish.
- When acclimating both fish and invertebrates, it is recommended to use a separate bucket for each.
- It can be helpful to turn off the lights of your aquarium during the acclimation process to avoid shocking your Apistos.
Conclusion
The floating bag acclimation is more suitable for hardy dither fish, such as tetras, pencilfish, or rasboras.
But if you’re a first-time Apistogramma keeper, the Drip Acclimation Method is recommended as it will help to reduce stress and provide better protection for your delicate fish.
Hopefully, this guide will help you feel more confident in choosing the right acclimation process for your Apistogramma fish. If you are unsure or have any questions, don’t hesitate to reach out for help.
