Why Are Discus Fish So Expensive? (+ 10 Expensive Strains)

Why Are Discus Fish So Expensive

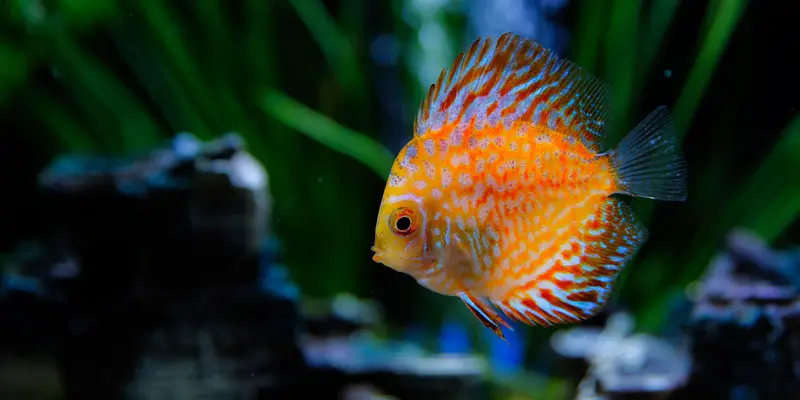
Discus fish (Symphysodon spp.), the King of the aquarium, are known for their striking beauty and royal colors. Despite their unique appearance, discus fish keep many fish keepers out of the hobby due to several shortcomings, and the most notable among them is their hefty price tag.

The average hybrid discus fish price can range from $30 to $150, while wild-caught discus fish is usually between $150 and $300. A breeding pair of discus fish can cost $300 to $1000. The price will depend on the strain, size, coloration, patterning, and body shape. 

You see, discus fish are not your boring, run-of-the-mill community fish, they are not cheap! If you’re thinking about getting discus fish, be prepared to shell out some serious cash.

This article will explain why discus fish is so expensive, and we will also list the most expensive discus fish strain in the world.

Enjoy!

Why Are Discus Fish So Expensive?

Discus fish are relatively expensive compared to other aquarium fish available in the market, especially these wild specimens. There are several reasons why discus fish are expensive.

They Prefer Warmer Waters

Wild discus fish come from lentic lakes and rivers in the lowland Amazon basin, where the average water temperature is about 86° F, although wild Heckel discus (S. discus) live in habitats with water temperatures of up to 90° F.

In our facilities, we usually set the water temperature to about 86-87° F. This is because discus fish grow faster and show off better colors at this heat. To maintain these temperatures, we need larger heaters than other tropical fish. Of course, the electricity bill will go up and this will add to the discus fish price.

For those discus fish keepers in cooler climates, you will definitely need a water heater – this is a big cost.

They Are Late Bloomers

Although discus has a long lifespan for tropical fish (10 to 15 years in captivity), they are late bloomers and don’t show their potential colors and patterns until they are about 2 – 3 years old.

Assuming you bought healthy and non-stunted younger (2″ – 2.5″), on average, they will reach the 6″ size range within 10-12 months when well cared for.

For commercial farms, growing discus from fry to adult involves a lot of time. This is really true for obtaining quality specimens as we have to weed out the fish that do not meet our standards along the way. During this culling process, time and money have been translated into cost, which will eventually be transferred to the discus fish price.

The higher quality strain with better coloration will, of course, cost more.

They Are More Difficult to Care For

Discus fish are notorious for being difficult to keep. They have very strict water requirements, and their food is relatively expensive.

Most people suggest using reverse osmosis (RO) water, but it will actually depend on the water conditions your fish have used before reaching your tank. Wild discus fish are acclimated to very soft and slightly acidic water. Using a reverse osmosis filter to provide pristine water conditions is the best way to go.

While captive-bred discus might have already adapted to harder water, depending on the area. For example, European-bred strains are more tolerant of harder water and can do well in general tropical fish tanks. 

As far as I’m aware, fishing farms in Asia, including Malaysia, Singapore, Vietnam, and China, discus are raised in soft and acidic water. Professional breeders Mr. Tony and Mr. Jeffrey Tan [1] also suggested using soft water for discus tanks. 

Another thing to consider is their diet. The best discus foods will have higher protein content and contain ingredients like blackworms, beef hearts, and shrimp. No matter you go with commercial beef heart flakes or making your homemade food, both come with a cost.

They Are a Shoaling Species

Discus fish are schooling fish by nature and thrive when kept in groups of their own kind. In the wild, discus fish are found swimming in schools of many dozens of individuals. As with most large South American cichlids, discus will become aggressive and territorial with each other if they are not kept in a decent-sized group.

Generally, I would recommend growing a group of at least 10 juveniles at the same time. This will allow them to form a natural hierarchy [2], with the strongest discus becoming the “leader” of the group. The rest of the fish will naturally fall into place in the social order, which will help keep aggression to a minimum.

While a single juvenile might set you back $50, a group of 10 discus will cost you $500 initially. Of course, more in the long run as they need to be fed properly and their tank maintained.

Discus Brands

There are many discus breeding brands in the trade, and the discus price will differ from one breeder to another. It depends on who bred the strains, quality, and availability. Discus enthusiasts are willing to pay higher prices for a favorite brand. As a result, driving demand gives the brand the ability to drive the price up, making it one of the most expensive fish in the hobby.

It’s a Labor-intensive Work

Photo: idfdiscus

As previously hinted, raising discus is a time-consuming and labor-intensive process simply because this fish takes a long time to reach maturity compared to other fish.

For commercial discus farms, they not only take care of fry to adults but also have to breed. 

Breeding fish in a farm is a totally different ball game, let alone discus fish, which require more care, pristine water conditions, and stable temperatures. This is a costly process as it involves a lot of workforces to sort through all the discus fish.

With that being said, all of these factors will add up to the discus fish price tag. So, the next time you see a discus fish for sale at your local fish store or online, remember all the work that goes into getting that discus from fry to full size!

Most Rare and Expensive Discus Fish

Now, we’ve known the discus fish price range and some of the factors that affect their pricing. Let’s take a look at some of the rare discus strains that command high prices.

Wild Royal Cuipeua Discus ($250.00 – $300.00)

The Wild Royal Cuipeua discus is one of the most sought-after discus fish due to its unique coloration and electric blue stripes. The most interesting thing about this strain is that its stripes can change color from different angles, making it even more visually appealing. 

Wild Red Ica Discus ($250.00 – $300.00)

Looking at the Red Ica Discus, it’s not hard to see why this discus fish is one of the most popular discus strains. Their vivid sunset coloration and graceful behavior make it an instant hit with discus hobbyists around the world.

Wild Jacarecappa Wild Discus ($250.00 – $300.00)

Similar to the Wild Red Ica Discus, the Jacarecappa discus also sports shining blue striations against a bright body in a mix of red, orange, and yellow, but the striations are absent in the back area. This discus fish is quite rare in the wild and only found in very specific areas.

Albino Platinum (Rabbit Eye) Discus ($100.00 – $200.00)

Also known as the Rabbit Eye Discus, the Albino Platinum Discus develop an opal white body and fins with a faint undertone of pink. The main attraction of this strain is its unique red eyes [3] and white base that resembles that of a rabbit.

Albino Pearl Diamond Discus ($100.00 – $200.00)

Light up your South American aquariums with the shimmering Albino Pearl Diamond discus fish! This fish is mostly butter yellow in coloration with translucent fins. A soft orange hue along the body and fins, plus the scarlet albino eyes, adds an exotic look to your discus tank.

Red Eagle Discus ($100.00 – $250.00)

The beauty of Red Eagle Discus opens up a discus world of colors that will take your breath away. This strain has been used to develop the Red Pigeon Blood Discus, a less expansive and plain variation. Aesthetically, both strains are very pleasing to the eyes.

Altum Flora Discus ($80.00 – $200.00)

An astonishing mixing pattern of brown rounded squiggles cover the upper and lower strikingly green body, and the middle area tends to be dark. Their fins are somewhat outlined with a tinge of brown coloration.

“Giant Blue” Turquoise Discus ($350.00 – $550.00)

This giant discus displays a majestic electric blue coloration along the body, where the fins are companies with blood red lines. These lines fade in at the turquoise base, making this fish a true visual delight.

Crimson Star Alenquer Discus ($200.00 – $300.00)

We have the most colors in the spectrum, but what about crimson red with stars? The Crimson Star Alenquer discus is one of the most popular discus fish due to its crimson coloration.

Striated Cuipeua Cross Discus($200.00 – $300.00)

Unlike its wild counterparts, the Striated Cuipeua discus shows a more subdued coloration with a thick dashed line horizontally running through the upper portions of its body. The eye-catching metallic green color on its head and fins makes this discus visually stunning.

So there you have it, a discus fish price list of some of the most popular and expensive discus strains in the world. Please note the price ranges are only estimates and may vary depending on the supply and demand.

Generally speaking, newer or harder-to-breed strains are rarer than others and thus more expensive. Moreover, the trends change every now and then, so stay updated on the discus world is important.

Final Words

If you’re looking to add one of these amazing discus fish to your collection, be sure to do your research and find a reputable discus breeder or dealer.

You can buy discus fish online or from local breeders. For those who never kept discus fish before, as with any fish, stay away from the extremes in price – leave the very expensive discus fish to the experienced hobbyists and don’t buy these cheap ones that are often sickly and won’t thrive.

Discus fish are delicate creatures and require a well-maintained aquarium with the right water parameters, diet, and care. They are not recommended for beginners. Do your homework before making a purchase and be prepared to provide your discus fish with the best possible care. Thanks for reading!

Article Sources:

  1. Mr. Tony & Mr. Jeffrey Tan [Link]
  2. Parental care and the development of the parent offspring conflict in discus fish [Link]
  3. Discus: The whole truth and nothing but [Link]

10 Easy & Fun DIY Aquarium Lid Ideas (Glass & Plastic)

DIY Aquarium Lid

An aquarium lid or cover is an essential part of your tank setup, especially if you have many good jumpers. It also serves several other purposes – it prevents debris from falling into the aquarium, keeps out your curious cat or other pets, and provides a tight seal to reduce evaporation that contributes to humidity in your home.

You can buy a commercial aquarium lid or cover from your local pet store, but they can be expensive, so why not make your own? 

With a few household supplies, you can easily build a custom aquarium lid that fits your tank perfectly. It’s cheaper and works better; more importantly, it’s FUN!

This guide is not a step-by-step tutorial but 10 easy and cheap DIY fish tank lid ideas to get you inspired.

Glass Aquarium Lids

Glass aquarium lids are a clear choice (pun intended) when it comes to durability, effectiveness, and versatility.

The Pros

Let’s first look at a list of advantages of using a glass aquarium lid:

  • It provides an excellent seal to prevent evaporation and maintain moisture.
  • It won’t develop cloudy or foggy appearances over time.
  • It’s more durable and won’t bend or sag like acrylic lids.
  • It’s made custom for your aquariums so that you can choose predefined dimensions.
  • It’s easy to clean.

The Cons

There are some disadvantages and limitations that are challenged by solid glass lids:

  • It works better on aquariums with a rim at the top.
  • It’s breakable, and you and your fish can get injured.
  • It tends to be a bit more expensive.

In my humble opinion, the long-term benefits definitely outweigh the potential risks. I’ve used these lids for years in my different aquariums, and only one was broken because of an overly excited dog that leaped onto the coffee table. I also have never heard of anyone getting seriously hurt by a glass aquarium lid. If you’re always careful, it shouldn’t be an issue.

Don’t be intimidated by the glass-cutting process; it’s not as difficult as you think. These DIY glass lids are simple enough for anyone to accomplish.

DIY Sliding Glass Aquarium Lids

This fantastic yet simple design works better for small aquariums. It provides an excellent seal while still allowing easy access to the aquarium. All you need is a sheet of tempered glass, some outside corner moulding, and a handle. You can find all of these supplies at your local hardware store.

Painting these corner mouldings might have looked better to match the trim for “show” tanks. Tempered glass is also more expensive than regular glass, but it’s worth the investment for safety.

You would be interested to know: Where to Buy & Cut Glass for DIY Aquariums

How to Make Sliding Glass Aquarium Lids

This instructional video from Steve Poland Aquatics seems to be the originator of the sliding design. Steve does a great job of explaining how to make these lids step-by-step. If you decide to cut the glass by yourself, be careful as you can easily cut yourself.

If you’re going to use tempered glass, you’ll need to order it a few days in advance. In addition, it’s a smart option to ask the seller to polish and sand the edges to prevent an injury. For the handle, a pack of adhesive wall hooks works great and is readily available at any dollar store.

DIY Hinged Glass Aquarium Lids

Most commercial glass lids come with two thicker, tempered glass panels hinged together. This design is very popular because it’s easy to open and reliable for larger aquariums.

These commercial lids feature a dark plastic hinge around the whole lid. As a result, it creates a noticeable shading in your aquarium. Instead, this design uses four clear acrylic hinges in the middle, so there’s no shading over the aquarium.

This looks better and allows you to open just one-half of the lid, making it easier to feed your fish or work on your aquarium. You can make your own by following this guide from Odin Aquatics.

Plastic (Acrylic & Polycarbonate) Aquarium Lid

Acrylic plexiglass sheets and polycarbonate panels are two types of clear plastic that can also be used for aquarium lids. These synthetic glasses are much cheaper than standard glass but only half the weight of comparably sized glass by volume.

Interestingly, acrylic sheets can withstand roughly 17 times the impact of traditional glass, and polycarbonate is even stronger, with impact resistance 250 times that of traditional glass. Many DIY aquarium lid kits use these materials thanks to their durability and low cost.

Nevertheless, these options do have their own set of pros and cons [1]:

Acrylic or PlexiglassPolycarbonate
Pros1. Easier to cut than polycarbonate
2. Can be polished, both for scratches and clean edges
3. Better glue bonding
4. Clearer
5. Cheaper by as much as 35%
1. Greater strength than acrylic
2. More flexible than acrylic; can be shaped at room temperature
3. Can be exposed to high temperatures and is non-flammable
4. Highly resistant to chemicals
5. Can be drilled without cracking
6. Lighter in weight than comparable acrylic
Cons1. More rigid
2. More likely to crack during drilling or upon impact
3. More likely to chip
4. Should not be exposed to open flames
1. Scratches easily
2. Cannot be polished
3. Can be dented easily
4. More translucent than transparent as compared to acrylic

As an insatiable DIYer, below are several designs and methods I’ve used in the past to create my own aquarium lids.

DIY Polycarbonate Aquarium Lids

When people think of polycarbonate panels, they often think of conservatories and greenhouses since this thermoplastic material is virtually unbreakable and is capable of transmitting light within the 80 to 90 percent range [2].

For our purposes, we can use it to create a practically indestructible aquarium lid that will provide many years of service. It will not bend or warp like acrylic sheets and won’t crack or shatter like glass.

This video will show you how to make your polycarbonate aquarium lid. Because of the superior strength of polycarbonate, you will need to use a table saw to cut it down to the dimensions you require. If you don’t have access to a table saw, you can have your local hardware store or glass company make the cuts for you.

DIY Acrylic Rimless Aquarium Lid

Acrylic or Plexiglass Sheeting is cheaper, looks clearer, and is easier to work with. However, some issues you may face sooner or later:

  1. Acrylic will slowly start to bend if not stiffened.
  2. The condensation that builds up inside will drip from the edges onto the table.
  3. Acrylic tends to become yellowish.

Personally, I always recommend using polycarbonate instead of acrylic to avoid these issues. The extra money definitely is worth the investment, in my opinion.

If you decide to use acrylic anyway, this video tutorial shows you how to make a basic rimless aquarium lid out of plexiglass. You’ll need some tools to make the cuts, but it’s still a relatively easy project that most people can do. You’ll need to ensure the measurements are precise so that the lid fits snugly on your tank.

DIY Bow Front Lids

If you have a front bow tank, you know how it can be difficult to find a ready-made lid that fits perfectly. Even if you do find one, it’s often expensive. The good news is that you can make your own for a fraction of the cost.

This video will show you how to make a custom aquarium lid for a bow front tank. I like the idea of using a piece of the hinge to connect the glass and plexiglass panels together. This way, you can open one side of the lid at a time, making it easier to feed your fish or work on your aquarium. More importantly, it looks much nicer than a piece of rectangular lid.

Looking for how to cut the perfect shape out of plexiglass? Check out this video:

DIY Aquarium Hood With Lights – The king of DIY

Adding lights to your aquarium hood is a great way to show off your fish. In this video, Joey shows you how to build the aquarium cover lids with the led lighting for a 375 gallons aquarium.

Given the fact whether you use a glass or plexiglass lid, the light will be blocked to some extent. In order to ensure that your fish have enough light, you may be interested in the next two ideas.

How To Build a Mesh/Screen Aquarium Lid

Clear netting lets more light (up to 99% ) in than glass or plexiglass, making it a good choice for reef tanks. Also, it allows proper evaporation and builds up salt creep that can occur with glass or Acrylic lids.

In this video, you’ll learn everything you need to know about making a stylish mesh screen top using clear netting and some basic framing materials. You’ll also see how to add a frame to the lid to make it more sturdy. It works for both rim and rimless aquariums, but you may need to make some adjustments for the latter.

DIY Egg Crate Aquarium Lid

Another great idea for an aquarium lid is to use egg crates. The egg crate is a material often used for numerous things, including skimmer stands, frag racks, and of course, lids.

What’s great about the egg crate is that it has very little impact on light penetration. You can assemble it in any shape or size that you need. 

It’s 100% reef safe and can be used in both freshwater and saltwater aquariums. For saltwater aquariums, it’s best to use a black egg crate since it’s less likely to attract plague algae growth.

In this video, you’ll learn how to make a simple egg crate lid for your aquarium. The process is very straightforward and requires a few basic supplies that you probably already have around the house.

Conclusion

Aquarium lids are important, albeit often overlooked, part of any fish tank. They not only prevent fish from jumping out but also help maintain optimal water temperature and prevent evaporation.

If you’re looking for a cheap and easy option, acrylic lids are probably your best bet. For those who want something that looks a little nicer and lets more light in, then egg crate or mesh screen lids are good choices.

We hope these 10 diy aquarium lid ideas have inspired you to make your own! Which one is your favorite? Do you have any other tips or tricks for making diy aquarium lids? Share your thoughts in the comments below! Don’t forget share your photos and videos with us once you’re done.

Article Sources:

  1. What is the Difference Between Polycarbonate and Acrylic? [Link]
  2. Why more growers are choosing polycarbonate panels [Link]

Mbuna Cichlids 101: Types, Tank Setup, Size, Diet & Tank Mates

Mbuna Cichlids: Cynotilapia Afra (Dogtooth Cichlid)

So you have finally gravitated toward Mbuna cichlids with their stunning colors but have yet to set up a tank to house these beautiful fish. Then, you are in the right place because this guide will tell you everything there is to know about Mbuna care.

We will cover care tips like their aggression, natural habits, tank mates, size, diet, and different types and their compatibility so you can manage their aggression and keep the peace.

Enjoy!

Mbuna in Nature

Mbuna is one of the large groups of Cichlids that are endemic to Lake Malawi in eastern Africa. The term mbuna means “rockfish” or “rock-dwelling” in the local Tonga language and refers to their habitat.

Unlike other open water swimmers that live in sandy shores, such as Utaka cichlids and many Haps, Mbuna inhabits the rocky shores and coastal zones full of crevices and cracks.

Because of the isolated habitats, Mbuna has evolved into over 295 [1] described species that belong to 13 genera, of which more than 200 remain undescribed, making it one of the most species-rich freshwater fish in the world. Species classified into any of the genera listed below are considered Mbuna.

  • Abactochromis
  • Cyathochromis
  • Cynotilapia
  • Genyochromis
  • Gephyrochromis
  • Iodotropheus
  • Labeotropheus
  • Labidochromis
  • Maylandia
  • Melanochromis
  • Petrotilapia 
  • Pseudotropheus
  • Tropheops

Mbuna Cichlid Types

Though hundreds of Mbuna species are recognized in the wild, far fewer are stocked and sold as pets. From my many years of experience in the Mbuna world, here are some of the common species:

The 5 Best Beginner-Friendly Mbuna Cichlids

YellowTailAceiCichlid

If you’re someone who is planning on your first “peaceful” mbuna aquarium, I highly recommend you start with the following species that are more beginner-friendly. 

Author notes: I have no study to support my claim. It is strictly based on my anecdotal Mbuna experience only. Like any other Cichlids, Mbunas have their own distinct personality. Even a peaceful Yellow Lab can be nasty. You might have a different experience.

Most Aggressive Mbuna Cichlids

Bumblebee-Cichlid

Many mbuna cichlids are extremely aggressive and territorial, especially when kept in too small of an aquarium. Some of them can be quite feisty and are often considered a “frequent killer” when they reach maturity.

As a cichlid enthusiast, here are some of the more aggressive Mbuna I have come across over the years:

You might be interested to know: Top 10 Most Popular Mbuna Cichlids with Pictures

Mbuna Size

As we mentioned earlier, there are almost 300 Mbuna species, which means that Mbunas can vary greatly in size. The average Mbuna size will usually reach a length of between 4 to 5 inches long when in captivity. 

In the wild, the smaller mbuna will grow to a maximum of about 3 ~ 4 inches (7.6 ~ 10 cm), while the largest species can get up to 8 inches (20 cm).

Below is a Mbuna size and aggression chart for different Mbuna genera:

Aggression: 1 being the relatively peaceful, 5 be the extremely aggressive

GenusSizeDietAggression
Abactochromis 4.7″ (12 cm)Herbivorous4
Cyathochromis5.9″ (15 cm)Herbivorous3
Cynotilapia5.9″ (10 cm)Omnivorous4
Genyochromis5.0″ (12.6 cm)Piscivore5
Gephyrochromis5.0″ (12.8 cm)Herbivorous2
Iodotropheus4.3″ (10.8 cm)Omnivorous1
LabeotropheusL. fuelleborni: 12″ (30 cm)
Others: 4.5″ (11 cm)
Herbivorous4
Labidochromis2.5″ – 5.9″ (6.3 – 14.9 cm)Omnivorous2
Maylandia3.0″ – 5.9″ (7.6 – 14.9 cm)Herbivorous4
MelanochromisM. robustus: 7.9″ (20 cm)
Others: 2.6″ – 4.9″ (6.6 – 12.4 cm)
Herbivorous4
Petrotilapia 4.3″ – 6.7″ (11 – 17 cm)Herbivorous4
Pseudotropheus2.6″ – 6.3″ (6.7 – 16 cm)Herbivorous1 – 4
Tropheops2.5″ – 5.5″ (6.4 – 14 cm)Herbivorous4
Source: Fishbase

Mbuna Lifespan

The average lifespan of Mbuna cichlids is between 7 and 10 years with proper care. Like any other pet fish, Mbuna’s lifespan can be greatly influenced by water quality, diet, tank mates, and stress levels.

Mbuna Cichlid Care

When it comes to taking care of Mbuna cichlids, how you can manage their aggression is key. Though we have few “peaceful” candidates, Mbuna is still Mbuna – there are no guarantees that your Mbuna will get along with other Mbuna (or any other fish for that matter!) in your aquarium.

Aggression & Social Hierarchy

Mbuna cichlids are aggressive and territorial and are not considered community fish in any way. They display the most aggression towards their own kind and other species with the same or similar coloration and pattern. Aggressive behavior in Mbuna cichlids primarily consists of chases and bites. 

Scientists believe Mbuna is more aggressive than haps and peacocks due to its distinct habitat (social) structure and reproduction [2]. Like many other types of African cichlids, a male Mbuna must defend a spherical territory to ensure the success of reproduction in a high amount of habitat structure. Therefore, any similar-looking fish will be perceived as a threat to a polygamous male’s harem. 

Interestingly, these two factors also apply to these aggressive CA& SA cichlids, especially in females. [3]

There are many ways to reduce this aggression and cut down the mortality rates among aquarists: 

  1. First and foremost, ensure your selected species have the same aggression level.
  2. Start with juveniles for mixed Malawi aquariums.
  3. The sex of your fish is important. I would recommend the All-Male Mbuna tank for lightly or moderately stocked plans.
  4. Heavy stocking with strong filtration and large water changes.
  5. Avoid housing closely related species of the same genus or with a similar appearance.
  6. If you plan to introduce more fish, add more than 3 fish at one time.
  7. Dim the lights a bit more (or turn them off) except during feeding times.
  8. Since warmer water increases aggression in tropical fish [4], try to keep their water temperature at 72 to 75 ° F (22 to 23.8° C)
  9. Periodic small feedings can also help reduce aggression.

Tank Size

As you might know, Lake Malawi is the third largest and second deepest [5] lake in Africa. When setting up a good aquarium for Mbuna, you should try to replicate the deep and wide lake environment.

While salesman and breeders recommend a 30-gallon tank, I believe this is only adequate for stocking Mbuna juveniles. Once Mbuna grow to their full size, they will require much more room, and a 30 gallons tank will be completely inadequate. A 55-gallon aquarium is actually the minimum you should go for a long term Mbuna cichlid keeper. 

The stocking number of Mbuna depends on your fish size and stocking density [6]. Hopefully, the following chart can give you some ideas:

For a 55-gallon tank:

Fish SizeLight StockingMedium StockingHeavy Stocking
4″51649
5″2925
6″+1415

For a 125-gallon tank:

Fish SizeLight StockingMedium StockingHeavy Stocking
4″103298
5″51750
6″+3929

Water Chemistry

Water chemical characteristics involve parameters such as pH, temperature, alkalinity, and dissolved oxygen, which are vital for Mbuna’s care. 

Lake Malawi is a rift lake that is very alkaline yet has relatively soft to moderately hard water, which is caused by the high evaporation rate and dissolved carbon dioxide (DIC) in water.

Since there are no tides or currents, most Mbuna lives in the depth of 130–330 ft (40–100 m), where the dissolved oxygen and temperature is more stable. 

Therefore, you should attempt replicating these water parameters in the home aquarium.

  • Water temperature: 72 to 75 ° F (22 to 23.8° C)
  • pH levels: 7.8 to 8.6
  • Water hardness: 4.0-7.5 dH
  • Ammonia: 0 ppm
  • Nitrite: 0 ppm
  • Nitrate: <30 ppm

To attain and maintain a high pH in your tank, the most common method is to use a substrate of crushed coral sand that naturally raises and maintains a stable high pH level. Well, if you choose other types of substrates, you can use it in the filter(s), it will dissolve faster. Similar materials like crushed seashells or aragonite can also be used.

Cichlid Lake Salt, 1 kg / 2.2 lbs
  • Seachem Cichlid Lake Salt- Natural Environment of African Cichlids Treatment for Freshwater Aquariums
  • NATURAL ENVIRONMENT: Cichlid Lake Salt is a chemically sound blend of salts designed to replicate the...
  • BLEND OF SALTS: The blend of salts contains all physiologically essential elements such as magnesium,...
  • HARDNESS: Cichlid Lake Salt affects General Hardness only, it will not affect alkalinity or pH
  • DOSAGE: Cichlid Lake Salt is formulated so that dosages vary depending on the lake of origin and need...

Aquarists sometimes recommend Seachem’s Cichlid Lake salt as a buffering to increase the carbonate hardness in Malawi aquariums. 

Cichlid Lake Salt

However, just as the label states, it’s largely chlorides. Lake Malawi has a very low level of chloride in water (CL< 4.3 ppm) [7]. So I would not recommend using this product. 

I’m not saying this product is bad, but it’s not what you should be using to duplicate their natural habitat. Additionally, tap water can provide all the necessary trace element nutrition your fish needs. It also comes with a high price tag.

If you strive for perfection in recreating the water chemistry of Lake Malawi. Simply add 2- 3 level teaspoons baking soda (sodium bicarbonate) and 1/4 teaspoon Epsom salts (magnesium sulfate) to 25 gallons of soft neutral water. These are the best products in terms of price and availability.

Decor

Given the fact that these fish come from the rocky areas and reefs of Lake Malawi, Mbuna cichlids care in the aquarium would ideally consist of a sandy bottom with plenty of rocks.

A good option is limestones. Not only do they provide your fish with hiding places, natural decoration, and spawning sites, but they also aid in raising and buffering the pH and hardness.

Mbuna are avid diggers, so make sure the rocks are well secured, or they will dig them up and rearrange the entire aquarium.

There are other decorations you can use. My personal favorite is clay pots or pipes. These can be very attractive, as well as offer a place to hide when they feel threatened. Mbuna will also often lay their eggs in these pots or pipes.

Food & Diet

Besides their aggression, Mbuna is well known to be susceptible to getting what has become known as Malawi bloat, which is called African cichlid disease or African bloat.

I know you probably have heard that the main cause of Mbuna bloat is the high protein diets. But in my experience, stress and poor water quality are two major culprits leading to Mbuna bloat and other diseases.

Most Mbuna cichlids are herbivores except for Genyochromis mento, a notorious fin-biter and scale-eater. In the wild, they primarily feed on aufwuchs – a combination of algae, diatoms, biofilm, and tiny organisms like crustaceans and insect larvae.

In the aquarium, you should provide them with a staple diet that consists of high-quality cichlid pellets or flakes, supplemented with vegetable matter and small meaty food, such as insects, Mysis, and brine shrimp.

Mbuna Tank Mates

A common question is, what fish are compatible with my Mbuna cichlids? Well, the answer to this question depends heavily on which species you’re talking about and how you plan to stock your tank.

Generally speaking, Mbuna should be kept with mbuna only. For beginners, start with a specie-only tank with one of the “peaceful” mbuna in the above list. Buy a group of juveniles to give you a better chance of getting at least one male. Raise the fish together and allow them to form their own hierarchy.

Once you learn about the path of Mbuna cichlids care, you can try your hand at a mixed Mbuna tank. If you want to go this route, do your homework and make sure the species you’re interested in are compatible.

Mbuna Cichlids Compatibility Chart

Below is our Mbuna compatibility chart that covers the 13 genera. This chart is a guideline to help you determine which Mbuna are compatible with each other.

Mbuna Cichlids Compatibility Chart
Mbuna Cichlids Compatibility Chart 

For those interested in the Malawi show tank, an All-Male mixed tank is a way to go. This will give you the most vibrant colors without worrying about the burden of groups of babies. Of course, it can be challenging since monomorphic species are difficult to sex. 

Breeding Mbuna Cichlids

Mbunas are easy to breed in the aquarium; these colorful and handy fish are maternal mouthbrooders and often reach sexual maturity about a year old and have grown to about 3 inches.

Males tend to grow slightly larger than females and often have more pronounced coloration. A dominant male will have the brightest and most rich colors and will not allow any subdominant males to mate within his territory.

In certain species, subdominant males usually fade in color to look like females to avoid aggression from the dominant male. Quite often, in an all-female tank, a dominant female will show male traits and colors.

Like haps, Mbunas are polygamous and form harems in the wild consisting of 1 male to several females.

When ready to spawn, the males will dig a nest in the sand or among the rocks, to where they will then entice the female to lay her eggs. A female usually lays between 10 to 30 eggs per clutch, depending upon the size of the female.

After the female Mbuna lays her eggs in the nest, the male fertilizes them. The female will then scoop up the eggs in her mouth and carry them around until they hatch, which usually takes between 21 to 31 days, during which they will not eat.

During this period, the female can get very weak and more easily stressed. Sometimes, she may spit out the brood too early or even eat them, so separating the female from the group is recommended.

Author notes: Breeders often strip the fry from the female’s mouth at the two-week stage to raise them in a separate tank to improve the fry’s survival rate.

The fry are free-swimming about 3 to 7 days after hatching and will start to look for food. Mbuna fry are very small, so you will need to provide them with live foods, such as baby brine shrimp or microworm.

Avoid Crossbreeding

Mbuna have proven themselves to be one of the easiest aquarium fish to breed. However, avoiding crossbreeding Mbuna with other cichlid species is important since we don’t need more hybrids. [8]

That’s why you should not keep two or more species in the same genus in your tank —as a thumb rule, crossbreeding usually happens when fish from within the same genus, particularly a male of one species and only the female of another.

Guide Wrap Up

Now, you have Mbuna cichlids care basics to help you get started with these amazing African cichlid species. They are some of the most colorful freshwater fish you’ll find and make an exciting addition to your home aquarium, but they are simply very aggressive.

Learning how to deal with their aggression is critical to your success in keeping Mbunas. Hopefully, this Mbuna cichlids care guide has given you the information you need.

Do you have Mbuna cichlids in your tank? Share your Mbuna experience with us in the comment section below. Also, if you have any suggestions to help us improve the care guide, we would love to hear from you.

Article Sources:

  1. The mbuna cichlids of Lake Malawi: a model for rapid speciation and adaptive radiation [Link]
  2. Aggression in closely related Malawi cichlids varies inversely with habitat complexity [Link]
  3. Habitat structure directly affects aggression in convict cichlids Archocentrus nigrofasciatus [Link]
  4. Water warming increases aggression in a tropical fish [Link]
  5. Lake Malawi – Wikipedia [Link]
  6. Calculating Stocking Ratio [Link]
  7. What Is the Chemical Composition of Lake Malawi Water? [Link]
  8. Who Needs Another Hybrid? [Link]

Pool Filter Sand for Aquarium: Safety, Price, Brands & Alternatives

pool filter sand for aquarium

It’s no secret that fish keeping can get pretty expensive. The costs can add up quickly between food, tanks, and equipment. But even on a tight budget, there are ways to keep your fish tank looking great without breaking the bank.

One way to keep the budget down on setup is by buying pool filter sand as substrate instead of the more expensive aquarium sand. However, is pool filter sand safe for aquariums since it contains silica that will ruin your tank with a diatom outbreak, or is there other alternatives?

In this article, we’ll go over everything you need to know about pool filter sand – its safety, the good and the bad, alternatives, price, brands, and some tips on how to safely use it in your aquarium.

Can You Use Pool Filter Sand for Aquarium?

PFS (Pool Filter Sand) can be used as substrate in an aquarium as long as you rinse it thoroughly though before use. However, not all swimming pool filter sands are created equal, and there is a chance that they may contain high levels of silica or other additives, which can lead to a horrible brown algae problem in your tank.

The ideal pool filter sands for most aquariums are ones that have NO additives and are as coarse as possible – #20 mesh or a lower number is what you’re looking for. 

Author note: #20 refers to the US Standard sieve sand can fall through a mesh made from 20 wires per inch before it is placed in bags.

The Myth of ‘Dangerous’ Quartz Sand in Aquariums

The main reason people are afraid to use cheap pool filter sand containing quartz (the dioxide form of silicon) in their aquarium is they’ve heard that the high amounts of silica will lead to brown algae blooms, especially in new aquariums.

While it’s true that the presence of high amounts of silica in the water may be a primary cause of brown algae, it’s not the silica (aka quartz) that’s the problem. It’s a fact that some pool filter sands also contain high levels of phosphates or other additives that can lead to algae problems.

Typically, silica sand sold under various names, including quartz, crystalline silica, flint, ground silica, and the main ingredients (chemical composition), is around 99.0-99.9% [1] silicon dioxide (SiO2) with a very low percent of other minerals and metals, depending on the source and grade.

In fact, this is the exact same chemical formula as your aquarium glass. If we consider the addition of quartz sand to our aquariums as ‘dangerous,’ then we should also avoid using any glass aquariums.

Another key takeaway is that quartz sand (SiO2) is practically insoluble [2] in water or acids at room temperatures. However, the solubility of amorphous silica (such as aluminosilicate) is higher than crystalline morphologies. It’s also nontoxic for humans and only causes serious lung disease when inhaled.

amorphoussilica

To be on the safe side, it’s best to avoid product contains amorphous silica, but many aquarists have used them with no problems whatsoever.

Also, silicon-based organisms are not available to any living creature because of their non-molecular structure [3]. Therefore, there will be no changes when the quartz sand passes through the guts of animals in your tank.

Given that, it’s pretty hard to make a case that pool filter sand is going to be ‘dangerous’ for your aquarium. If you see brown algae in a new setup, don’t be discouraged, it’s pretty common. You may just wait for your tank to ‘mature’ and keep scrubbing them off in the meantime.

Why not consider the process of dealing with brown algae as an initiation ritual that every new aquarium owner has to go through to become worthy of a nice and healthy tank?

The Real Danger – Sharp Edges

The actual danger of using pool filter sand in your aquarium is not the silica content but rather the sharp edges of the sand grains, which are formed during the melting process – a purely physical change without any occurrence of chemical reactions. 

That’s extremely dangerous for some bottom dwellers, like freshwater stingrays, lionfish, scaleless catfishes that spend a lot of time in contact with the sand since it could open up opportunities for injury.

The Pros & Cons of Pool Filter Sand

Now that we’ve gotten the dangerous part out of the way, let’s look at some of the pros and cons of pool filter sand for a tropical aquarium.

The Benefits

The biggest advantage of PFS (pool filter sand) is the price. A 50-pound bag of pool filter sand costs around $10 ~ $15, while other specialized aquarium sands can cost $1 per pound. That’s a significant saving, especially if you have a large planted aquarium or multiple tanks.

Besides the fact that pool filter sand is cheap, it comes in a more natural color, either beige, tan, or light brown, varying in different brands and regionsThe natural look can provide a more earthy feel to your planted aquarium and help create a more natural environment for your fish.

The Disadvantages

Unfortunately, the pool filter sand has some obvious downsides that you should be aware of before using it in your aquarium.

First, pool filter sand is always pretty dirty stuff that absolutely needs to be rinsed several times before being used in your aquarium; even the bag says ‘pre-washed.’ It might be a little bit tedious and time-consuming, but the process is not difficult. (more detail later in this post).

Second, though pool filter sand has a nice color, you have little option compared with other aquarium sands on the market come in a wide variety of colors. 

For example, if you are trying to create a natural aquascape with lots of plants and driftwood. The lighter color of pool filter sand can make your aquarium look ‘washed out’ and muted.

Another potential problem with pool filter sand is that it comes with a smaller grain size than commercial aquarium sand, making routine maintenance more difficult. The grain size can be slightly larger or smaller, depending on the brand.

The smaller the grain size, the easier it is for fish and other animals to stir up the sand, which can get into the water column and clog the intakes of your filter.

Last but most importantly, pool filter sand tends to clump up if there are no fish to keep the bottom agitated constantly. Once this happens, it’s impossible to break up the clumps without completely sucking all the sand out of the tank and starting over again.

Moreover, these algae are prone to grow within these clumps, creating an unsightly mess and potentially leading to water quality issues.

Pool Filter Sand Vs. Aquarium Sand

Whether you should use pool filter sand or commercial aquarium sand typically depends on your setup and what exactly you want in the tropical aquarium.

The following table summarizes the pros and cons of pool filter sand and commercial aquarium sand to help you make a decision:

Aquarium SandPool Filter Sand
Advantages1. Available in a wide variety of colors
2. Larger Grains
3. Easy to clean
1. Cheaper
Disadvantages1. Expensive1. Limited colors
2. Harder to clean
3. Tends to clump up
4. Must be thoroughly washed before use

Play Sand Vs. Pool Filter Sand

The low price of play sand is why many aquarists choose it as their substrate material. While play sand is relatively cheaper than pool filter sand, I’d go for the pool filter sand over play sand because:

  • Play sand is too messy and needs a LOT more time to clean it.
  • Play sand has very fine and nonuniform grain sizes, which can cause sand to clump and get into the water column more easily.

BDBS Vs. PFS

Black diamond blasting sand (BDBS) is so popular among aquarists because it’s very cheap and has a nice black color. Honestly, I often use both – HTH pool filter sand as a light substrate and BDBS from Tractor Supply as a dark substrate when I set up my new aquarium. 

BDBS has medium-sized grains and doesn’t clump as easily as play sand. I’ve never had any issues with BDBS getting into my filter intakes or water column. 

BDBS is way too messy and sometimes has a bit of oily residue. Make sure to rinse it really well before using it in your aquarium. After all, safety should be the top priority.

Best Pool Filter Sands for Aquarium

pool filter sand has different grain sizes
HTH had different grain sizes (Photo: minorhero)

Thinking about starting a new aquarium with pool filter sand? There are several brands available you can choose from, including HTH, AquaQuartz, and Mystic White.

My personal favorite is HTH brand pool filter sand because it’s the cheapest in my area – it comes in 10 dollars per 50-pound. I’ve never had any problems with clumping or getting into the filter intakes since it has bigger and more irregular darker granules than others. 

AquaQuartz pool filter sand is a good choice if you’re looking for a pool filter sand with white color or other brands unavailable in your local store. The price is higher than HTH and can be purchased on Amazon.

No products found.

How to Prepare Pool Filter Sand for Aquarium Use

Now that we know the pros and cons of pool filter sand, let’s take a look at how to prepare pool filter sand for aquarium use. As I mentioned earlier, pool filter sand needs to be rinsed several times before using it in your aquarium.

Here is a video showing you how to prepare pool filter sand for aquarium use:

Author note: Personally, I often put rocks and other decorations in first, then add pool filter sand on top. This way, it looks more natural.

FAQs:

Where to Buy Pool Filter Sand for Aquarium?

You can buy pool filter sand for aquariums in many places, including your local pool supply store, hardware store, or online.

I usually buy pool filter sand from my local pool supply store because it’s cheaper, and I can pick it up easily.

Will Pool Filter Sand Change ph and TDS?

The pool filter sand is practically insoluble in water, so it won’t change any water chemistry unless it has amorphous silica or other additives.

Is Swimming Pool Filter Sand Healthy Enough for Aquarium Plant Growth?

Pool filter sand by itself is just a substrate material and doesn’t contain nutrients that are necessary for aquarium plants (meaning it is inert). To ensure the healthy growth of your aquarium plants, you’ll need to add a nutrient-rich fertilizer to the pool filter sand.

Does Pool Filter Sand Need to Be Rinsed Off Before Adding to Aquarium?

Absolutely.

Can I Use Pool Filter Sand in Saltwater Aquarium?

Pool Filter Sand has at least 99% pure quartz and would definitely work for a saltwater aquarium.

How Much Pool Filter Sand for Aquarium?

The amount of pool filter sand you need for your aquarium depends on your tank size. You’ll need one inch of sand for small to medium aquariums (10 ~ 50 gallons) and two inches for large tanks (55 gallons or more).

Wrapping Up

By now you should have a better understanding of pool filter sand and whether or not it’s a good choice for your aquarium. As always, the best way to find out is to experiment and see what works best for you and your fish!

If you have any thoughts or feedback about this article, please leave a comment below! We’re committed to improving the content and would love to hear from you.

References:

  1. U. S. Silica Company Safety Data Sheet [Link]
  2. Silicon dioxide compound summary [Link]
  3. Silica Structure & Reactivity in Chemistry [Link]